What Is A Brad Nails? The Ultimate Guide To Understanding This Essential Fastener
Ever wondered what a brad nail is and why it’s such a big deal in the world of carpentry and DIY projects? Well, you’ve come to the right place! Brad nails are those tiny yet mighty fasteners that play a crucial role in holding things together without making a fuss. Whether you’re building furniture, installing trim, or working on your dream home project, brad nails are your secret weapon. So, let’s dive in and uncover the magic behind these little wonders!
Before we get into the nitty-gritty, it’s important to know that brad nails aren’t just any nails. They’re specially designed for precision work, and their small size makes them perfect for jobs where aesthetics matter. If you’ve ever seen a beautifully finished piece of furniture with no visible nail heads, chances are brad nails were involved. These little guys are the unsung heroes of the carpentry world!
Now, if you’re here, you’re probably someone who wants to know more about what makes brad nails so special. Whether you’re a DIY enthusiast, a professional contractor, or just curious about how things work, this article has got you covered. We’ll break down everything from the basics to advanced uses, so you can nail your next project—pun intended!
- Filiz Erfurt Eine Beeindruckende Geschichte Was Sie Wissen Mssen
- Wackeltitten Die Heiesten Pornos Clips Neu
Daftar Isi
- What is a Brad Nail?
- Brad Nails vs Other Nails
- Applications of Brad Nails
- Choosing the Right Brad Nail
- Tools for Using Brad Nails
- Common Mistakes to Avoid
- Understanding Brad Nail Gauges
- Materials Used in Brad Nails
- Maintenance Tips for Brad Nails
- Final Thoughts
What is a Brad Nail?
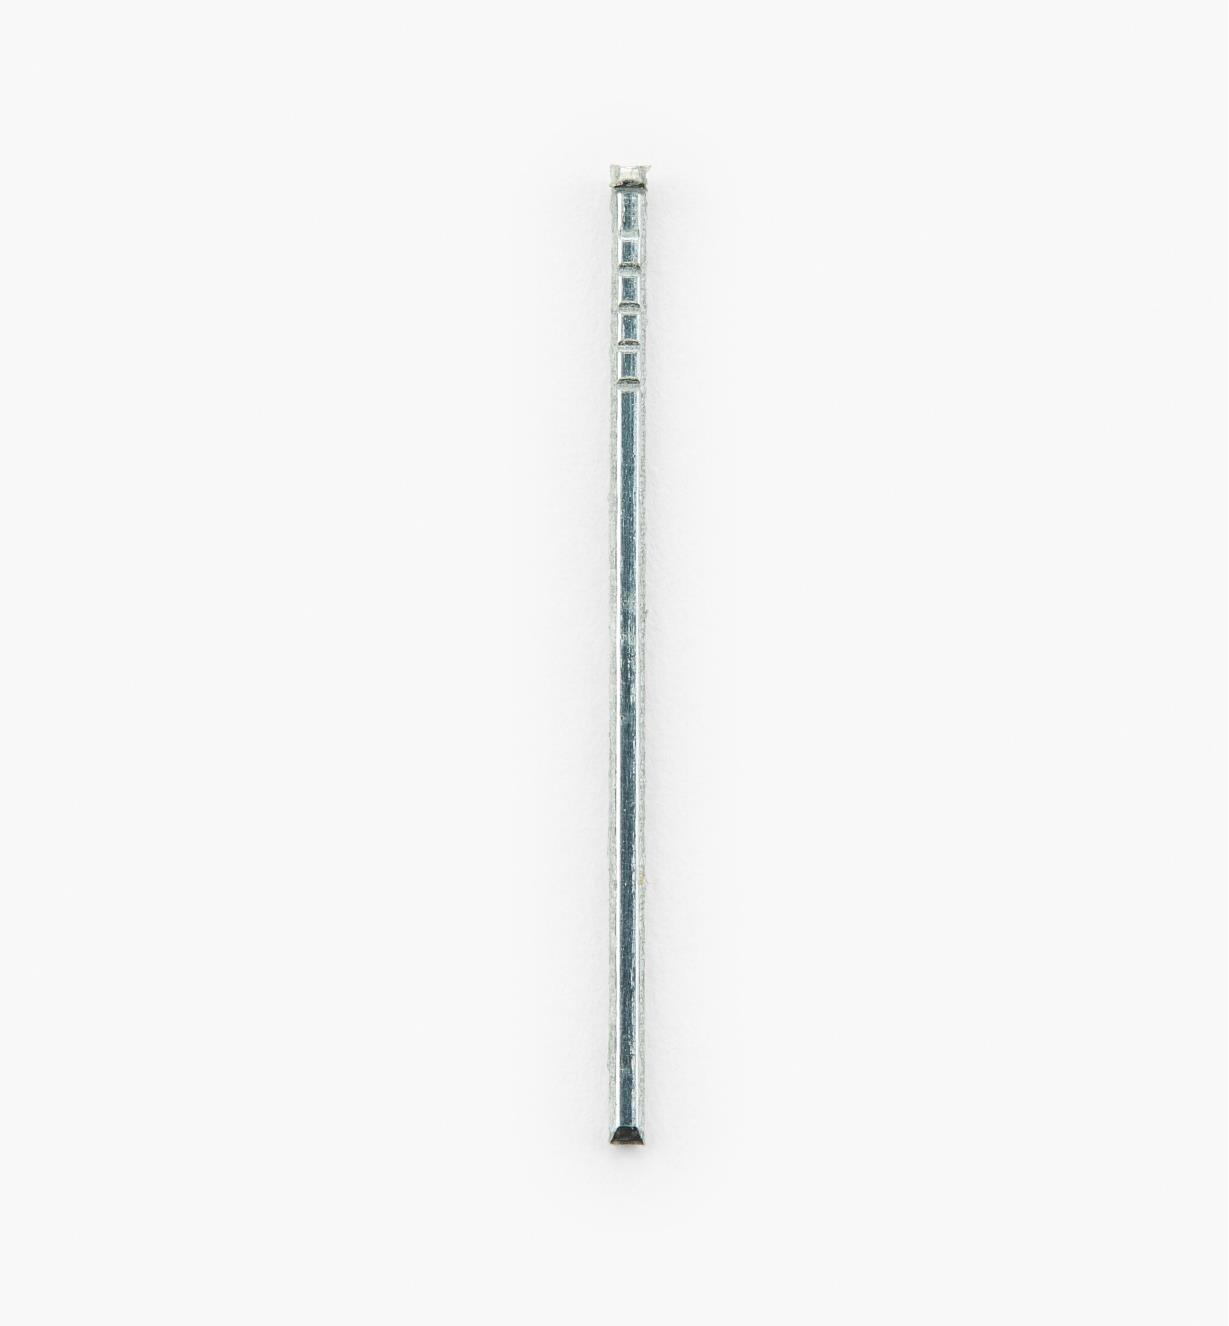
Alright, let’s start with the basics. A brad nail is a small, thin nail that’s typically used for delicate woodworking projects. These nails are usually between 18 and 23 gauge, which means they’re super thin and won’t split your wood. The length of a brad nail ranges from 1/2 inch to 2 inches, making them versatile for different types of jobs.
Brad nails are often used in finish carpentry because they leave minimal surface damage. Unlike regular nails, brad nails have a smaller diameter, so they don’t leave big holes in your workpiece. This makes them perfect for trim work, cabinet making, and other projects where appearance matters.
Why Choose Brad Nails?
Here’s the deal—brad nails are all about precision. They’re designed to hold things together without drawing attention to themselves. If you’re working on a project where the final product needs to look clean and professional, brad nails are your go-to choice. Plus, they’re easy to use with a brad nailer, which makes your work faster and more efficient.
- Simple Brawl Apk Download Amp Infos Update 2024
- Fragen Fragen Fragen Der Ultimative Ratgeber Amp Tipps
Brad Nails vs Other Nails
Now, you might be wondering—what’s the difference between brad nails and other types of nails? Well, let’s break it down. Brad nails are thinner and shorter than finishing nails or common nails. While finishing nails are great for larger projects, brad nails are ideal for smaller, more detailed work.
Here’s a quick comparison:
- Brad Nails: Thin, small, and perfect for delicate work.
- Finishing Nails: Slightly thicker and longer, used for heavier projects.
- Common Nails: Thick and strong, used for structural work.
Choosing the right type of nail depends on the job you’re doing. For example, if you’re attaching baseboards or crown molding, brad nails are the way to go. But if you’re building a deck, you’ll need something more robust like common nails.
Applications of Brad Nails
So, where exactly do brad nails shine? Let me tell you—they’re everywhere! From small crafts to large furniture pieces, brad nails are versatile enough to handle it all. Here are some common applications:
- Trim Work: Installing baseboards, crown molding, and other decorative trims.
- Furniture Assembly: Putting together chairs, tables, and shelves.
- Picture Frames: Securing delicate frames without damaging the wood.
- Model Building: Perfect for constructing models and miniatures.
Brad nails are also great for repairs around the house. Need to fix a loose piece of trim? Grab your brad nailer and get to work!
Choosing the Right Brad Nail
Not all brad nails are created equal. When selecting the right one for your project, consider the following factors:
Gauge
The gauge of a brad nail refers to its thickness. A higher gauge number means a thinner nail. For most finish carpentry jobs, 18-gauge brad nails are ideal. However, if you’re working with thicker materials, you might want to go for a 16-gauge nail.
Length
The length of the brad nail should be appropriate for the thickness of the material you’re working with. As a general rule, the nail should penetrate at least 1/2 inch into the base material for a secure hold.
Material
Brad nails are typically made from steel, but you can also find them in stainless steel for outdoor projects. If you’re working on something that will be exposed to moisture, stainless steel is the way to go.
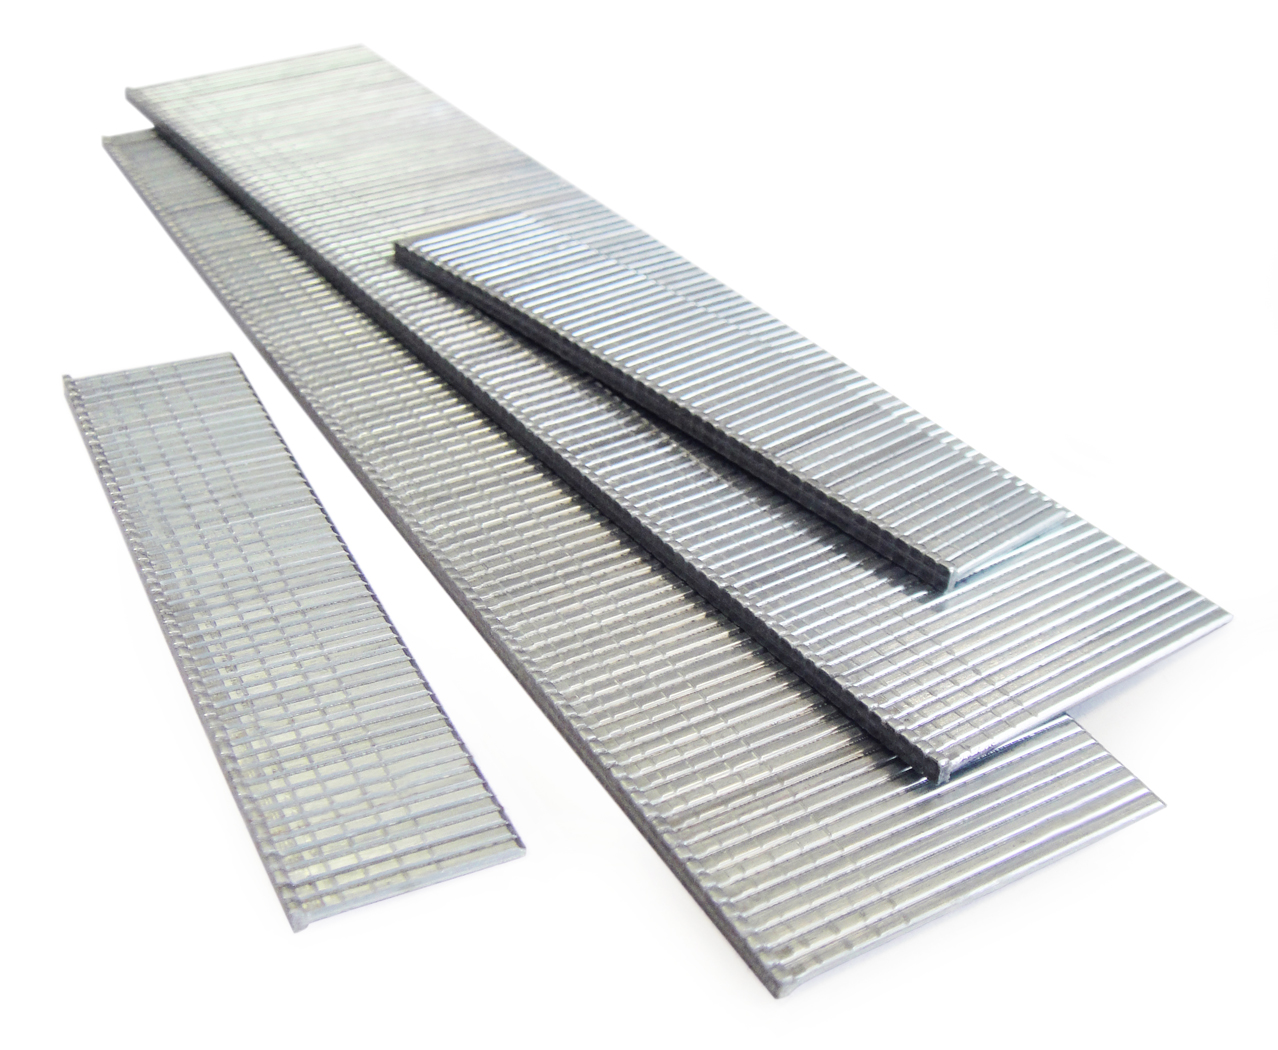
Tools for Using Brad Nails
Having the right tools is essential for getting the most out of your brad nails. The most common tool used with brad nails is a brad nailer. These pneumatic or cordless tools make it easy to drive nails quickly and accurately.
When choosing a brad nailer, look for one that matches the gauge and length of the nails you’ll be using. Also, consider whether you want a pneumatic model (powered by air) or a cordless model (battery-operated). Both have their pros and cons, so it depends on your specific needs.
Common Mistakes to Avoid
Even the best tools can lead to problems if you don’t use them correctly. Here are some common mistakes to avoid when working with brad nails:
- Using the Wrong Nail: Make sure the gauge and length of the nail match your project.
- Overdriving: Driving the nail too far into the wood can cause it to split.
- Not Adjusting Depth: Always adjust the depth setting on your brad nailer to avoid damaging the surface.
By paying attention to these details, you can ensure that your projects turn out perfectly every time.
Understanding Brad Nail Gauges
Gauge is an important factor to consider when choosing brad nails. Here’s a quick breakdown of the most common gauges:
- 18 Gauge: Thin and versatile, perfect for most finish carpentry jobs.
- 16 Gauge: Slightly thicker, ideal for heavier materials.
- 23 Gauge: Super thin, great for delicate work like model building.
Choosing the right gauge depends on the thickness of your material and the type of project you’re working on. Experiment with different gauges to find what works best for you.
Materials Used in Brad Nails
Brad nails are typically made from steel, but you can also find them in other materials:
- Steel: Strong and affordable, ideal for most indoor projects.
- Stainless Steel: Resistant to rust and corrosion, perfect for outdoor use.
- Coated Nails: Some brad nails come with a coating to improve grip and prevent rust.
Choosing the right material depends on the environment your project will be in. If it’s going to be exposed to moisture, stainless steel or coated nails are the way to go.
Maintenance Tips for Brad Nails
To ensure your brad nails last as long as possible, follow these maintenance tips:
- Store Properly: Keep your brad nails in a dry place to prevent rust.
- Clean Your Tools: Regularly clean your brad nailer to prevent jamming.
- Check for Damage: Inspect your nails before use to make sure they’re in good condition.
By taking care of your tools and materials, you can extend their lifespan and get the most out of them.
Final Thoughts
Brad nails might be small, but they pack a big punch when it comes to holding things together. Whether you’re a seasoned carpenter or a DIY newbie, understanding the ins and outs of brad nails can take your projects to the next level.
Remember, the key to success is choosing the right nail for the job and using the proper tools. With a little practice and patience, you’ll be nailing your projects like a pro in no time!
So, what are you waiting for? Grab your brad nailer and get to work. And don’t forget to share your thoughts and experiences in the comments below. Happy building!
- Kreuzwortrtselhilfe Leere Mit 6 Buchstaben Die Besten Lsungen
- Entschuldigung Keine Ergebnisse Gefunden Tipps Zur Suche
1 2 Brad Nails Bios Pics

Brad Nails Westcoast Moulding & Millwork Ltd.
18G BRAD NAILS BRAD NAILS COLLATED NAILS
